FloridaPast.com Welcomes You
  • Home
  • About Us
    • FAVORITE FloridaPast Links
  • FAQs
  • OUR OFFERINGS
    • Signs & Advertising Items
    • Florida Citrus Labels, Cans & More
    • 2nd Label Page
    • Pg 3 Labels
    • 4th pg Citrus Labels, Cans & More
  • HISTORICAL
  • BOTTLES JUGS GO-WITHS & HISTORY
    • Florida History ON PAPER >
      • FURNITURE, LIGHTING & DECORATOR
      • Cigar & Tobacco Antiques >
        • Matchbook Covers of FloridaPast Places
    • Brewery Items of FloridaPast
    • Restaurant China, Flatware, Drink Glasses, Mugs, Cups & Ashtrays
    • Florida_Art Gallery
    • Florida Photographs - Photograph Advertising
  • Souvenirs
    • SOUVENIRS #2 >
      • SOUVENIRS #3 >
        • #4 FloridaPast WOOD-CRAFT SOUVENIRS
    • #5 SOUVENIR JEWELRY
  • FloridaPast TOUR #1 Welcome Stations Stuckey's and Howard Johnsons
    • #2 HIGHWAY MEMORIES TOUR of FloridaPast >
      • #3 NATURAL SCENES TOUR of FloridaPast
    • TOUR FloridaPast ROADSIDE MOTELS & HOTELS #4 >
      • ATTRACTIONS TOUR OF FloridaPast #5 >
        • Attractions TOUR #5-B
        • #6 CITRUS TOUR of FloridaPast >
          • Citrus Tour#6B
          • Citrus Tour Page 6 C
          • TOUR OLD Images & History of FloridaPast #7 >
            • Seminole life in FloridaPast #8
            • MUSA ISLE TOUR of the Seminole Indians
  • Seminole Indian Crafts
  • Sumter County Virtual Museum
  • Sumter County - Now, Then & In-Between
  • Sumter County FloridaPast Then-n-Now Fade-Over-Snips
  • Earmarked Sumter County Service Stations
  • Churches of Sumter County FloridaPast
  • Bushnell, Sumter County Continued
  • Center Hill - Sumter County Now & Then and In-Between
  • Wildwood FloridaPast Fades n Such
  • Coleman - Wildwood - Sumter North
  • Monkey Tour 10
  • Contributions by other FloridaPast Folks
  • Tour of FloridaPast Captured by the Shutter
  • BEACHES & FLAMINGOS
  • Past Eat'in Places
  • Weeki Wachee Tour
  • LAKE COUNTY Now & Then Fades
  • Plant City Strawberry History Fades Images
  • Pasco County Now & Then History
  • ALLIGATOR BORDER FADES
  • Cypress Gardens Now & Then Fades and Visions
  • Orange County Fades and More
  • Citrus County Now & Then Fades and More
  • Ocala Now, Then and Inbetween
  • Daytona Beach Now & Then
  • St. Petersburg Places Attractions and History
  • Saint Augustine as it was
  • Alligator Farms Fades & Images of FloridaPast
  • Ma & Pa Roadside Citrus Stands of FloridaPast
  • Cross Creek Marjorie Kinnan Rawlings Now & Then Fades & History
  • White Springs - Stephen Foster Memorial
  • Various FloridaPast to visit
  • TAMPA FLORIDAPAST PAGE
  • Bok Singing Towers - Lake Wales FloridaPast
We Welcome Ya'll to SwampTreasures.com

This is our Temporary SwampTreasures.com Web-Page for Introduction
We Welcome You All to our Ventures into the Unknown
We never know when that urge will strike, to create something from nothing!

SwampTreasures.com was created to give You a glimpse into another world of Folk-Art. One that is seldom talked about, but which is, by far, the Best form of Folk Art on our Great Planet! Created by Mother Nature Herself, with Spirit and Soul. Speaking  Her words through those of us that Truly Understand Her Spiritual language. And so, helping us bring to life, her most Unique Pieces for Mankind to Appreciate.
ALL are One-of-a-Kind! There will Never be two alike. ..... more words to follow........................................
We will also be promoting local Folk Artists, that create with Mother Nature's Influences. We are Excited about this venture, and hope You'll Follow us.
In time, our normal SwampTreasures.com website will be open. For this moment, we join FloridaPast, our sister site.
More to come.......

__________________________

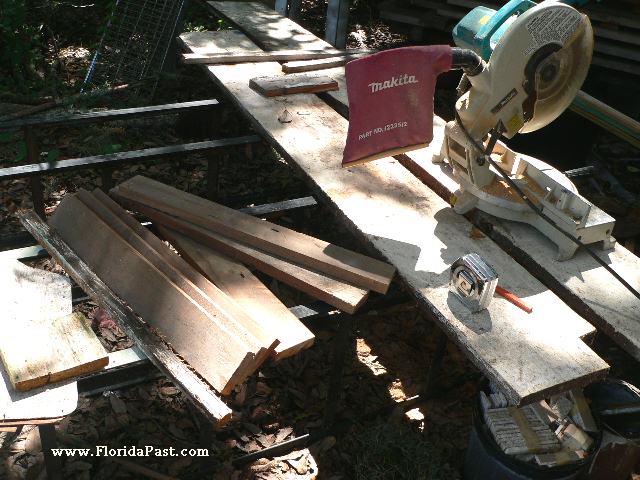
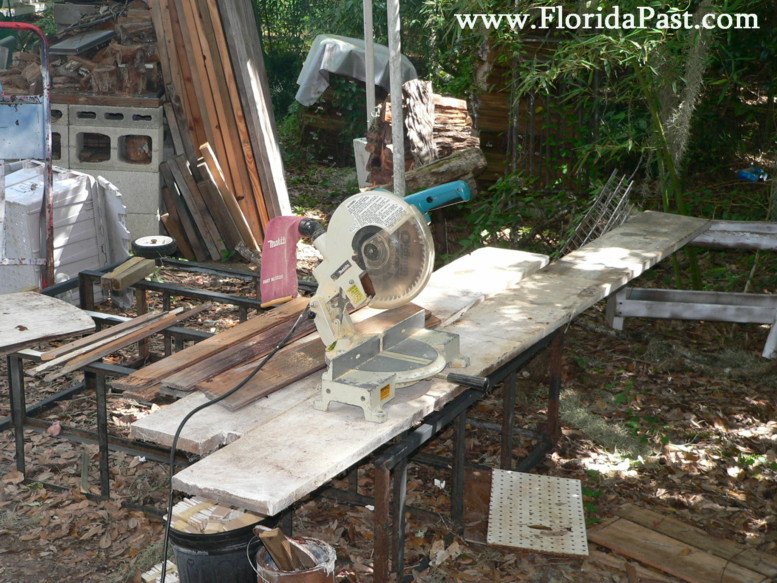
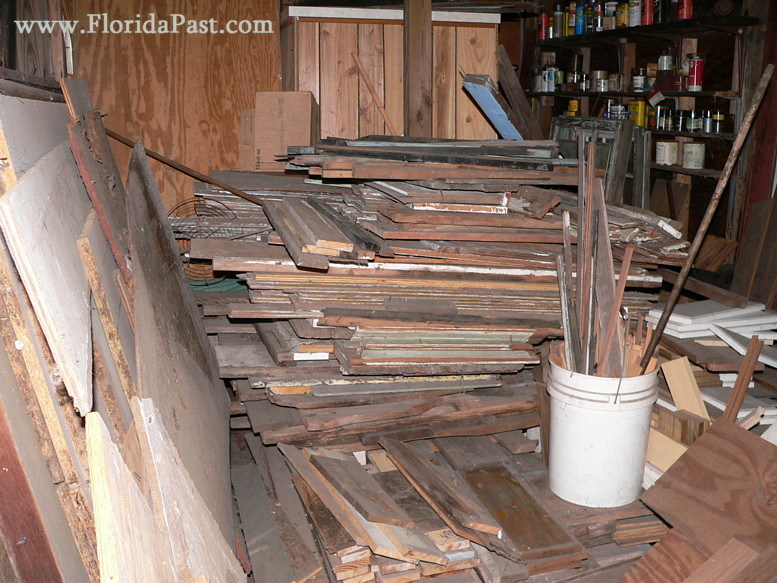
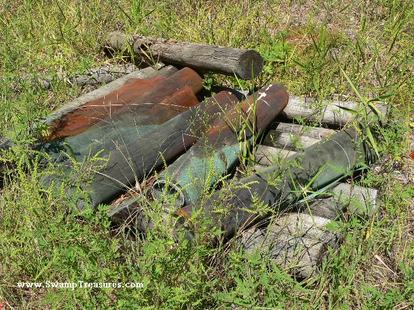
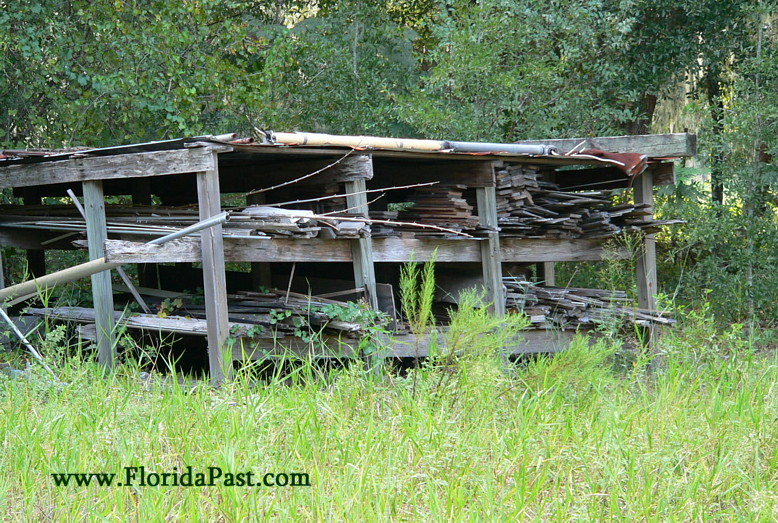
though this isn't really what I consider to be a SwampTreasure,
I thought I would share for the Creation of it.
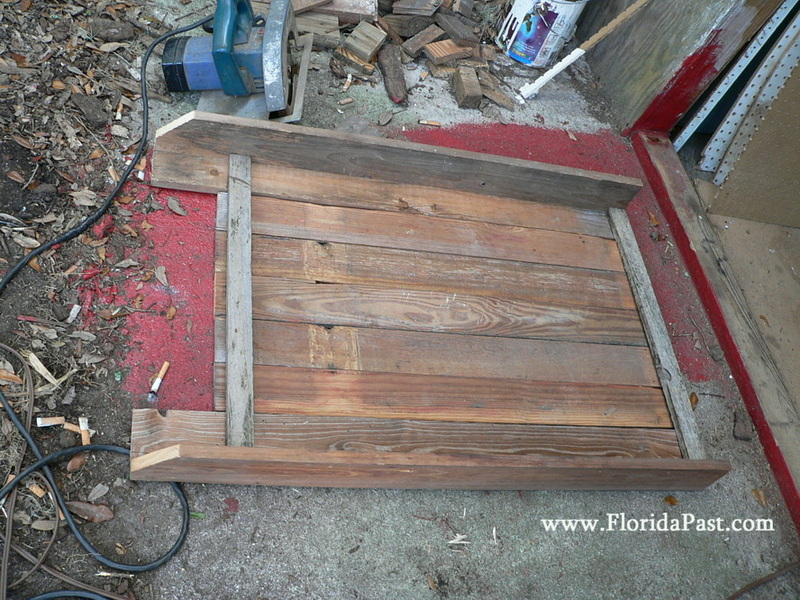
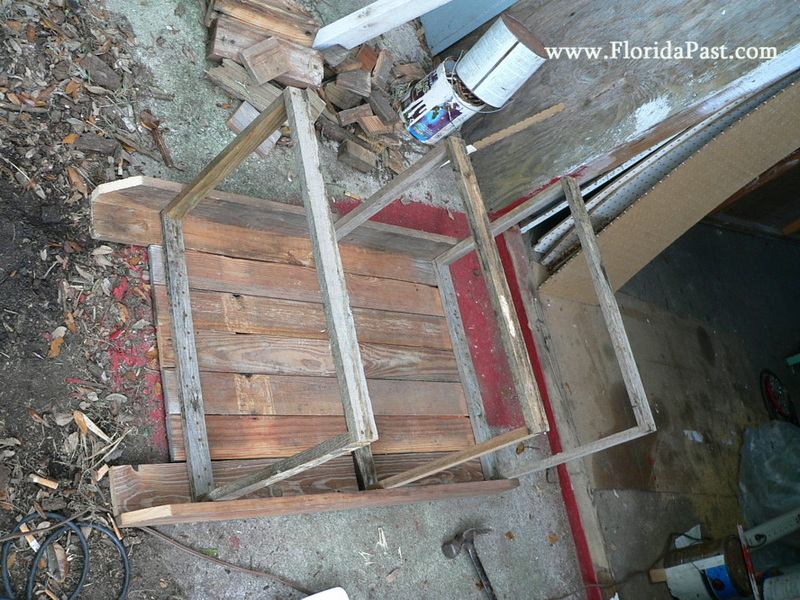
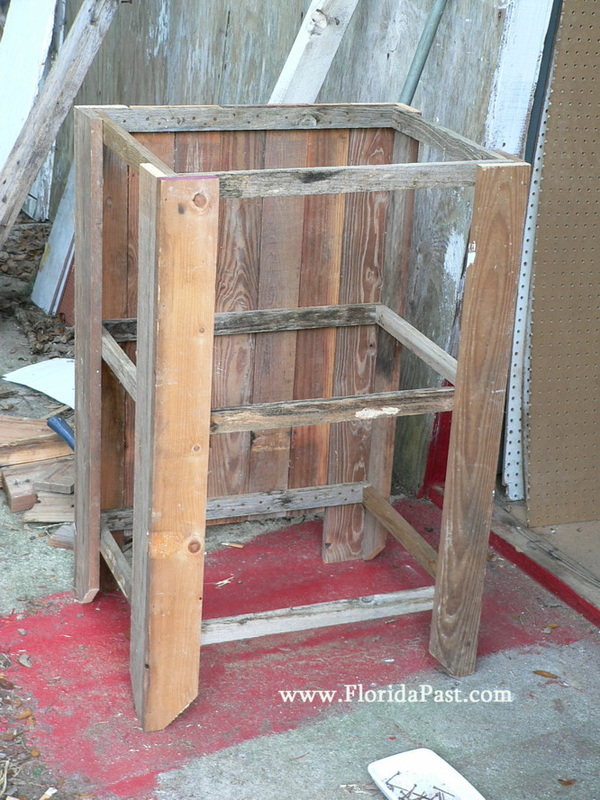
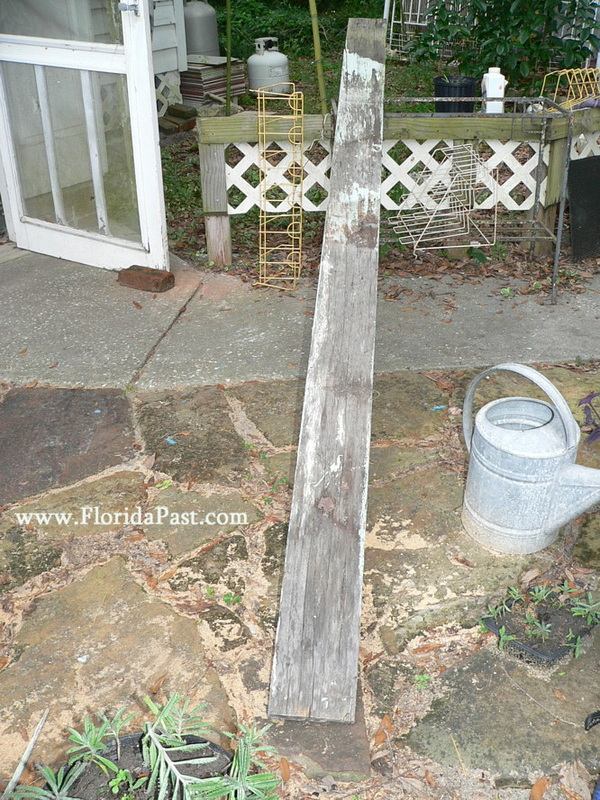
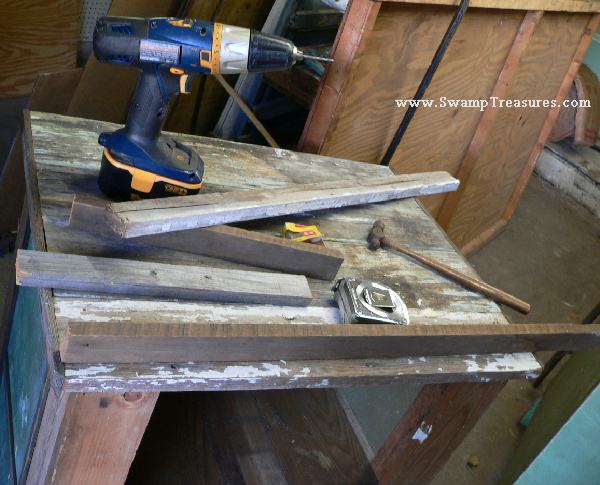
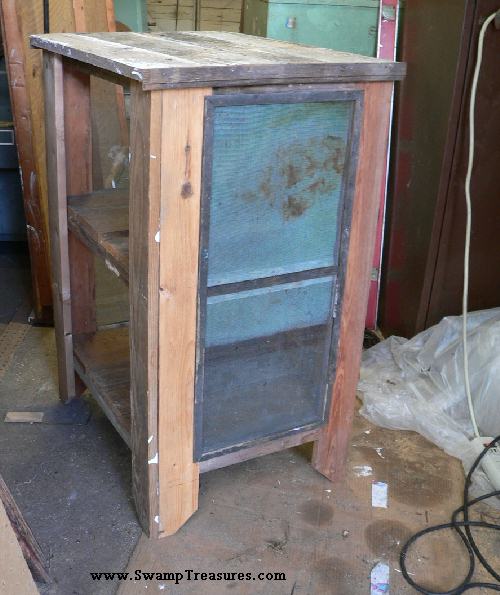
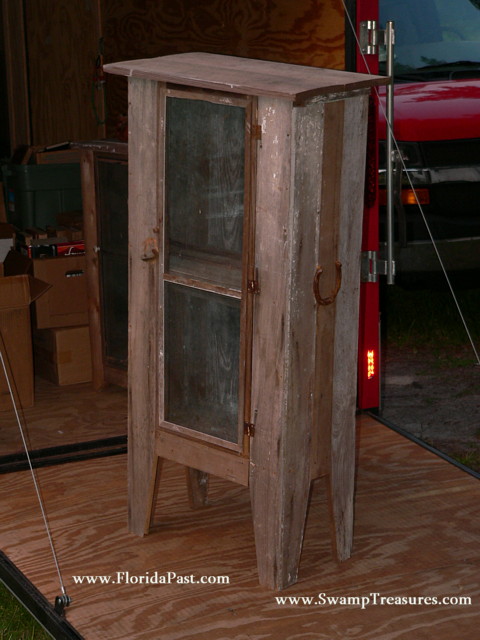
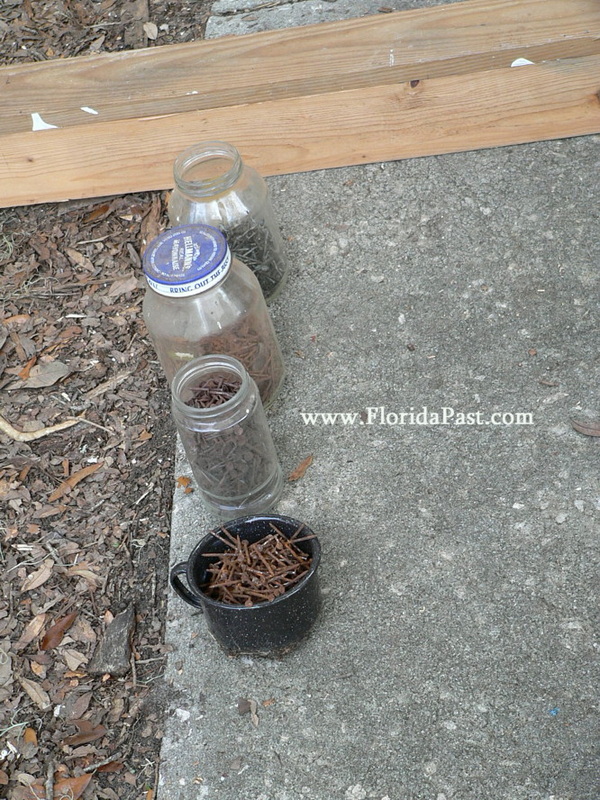
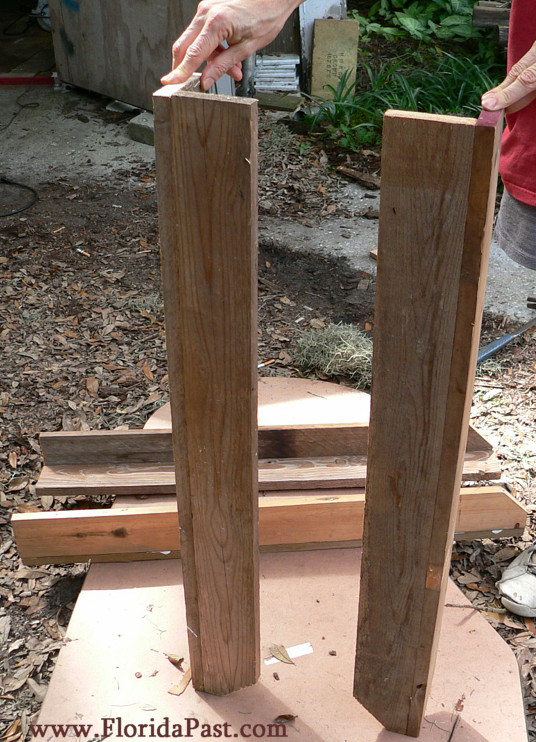
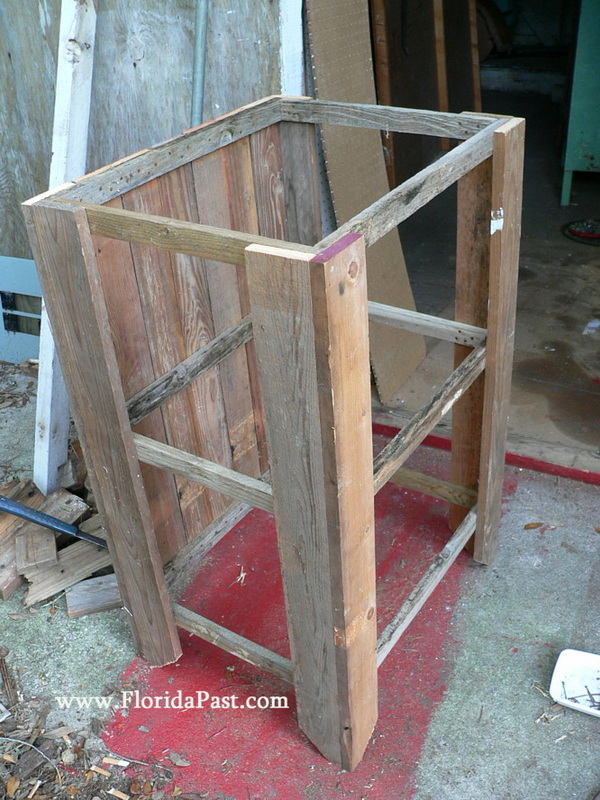
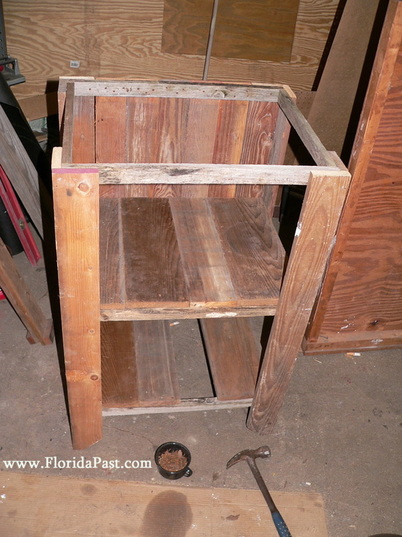
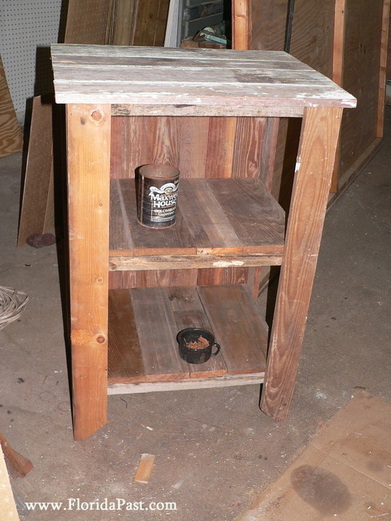
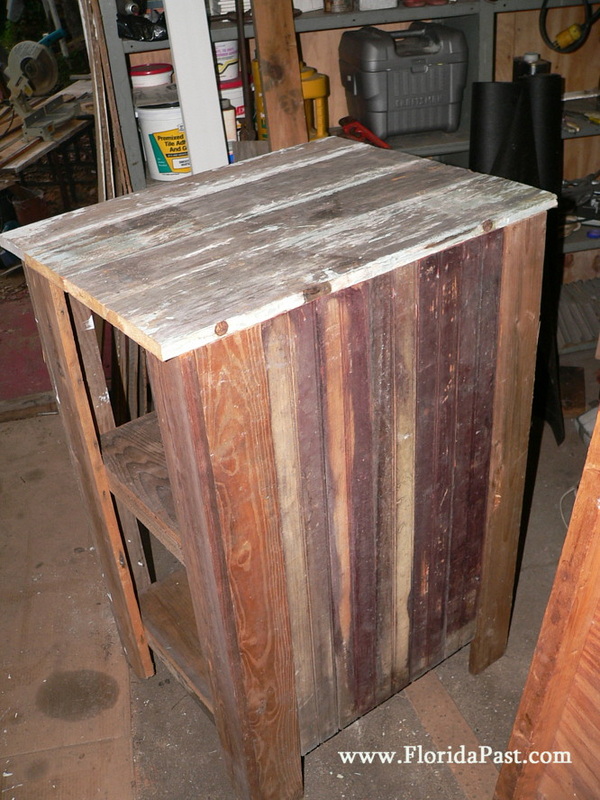
A PIE-CUPBOARD CREATED IN ONE DAY
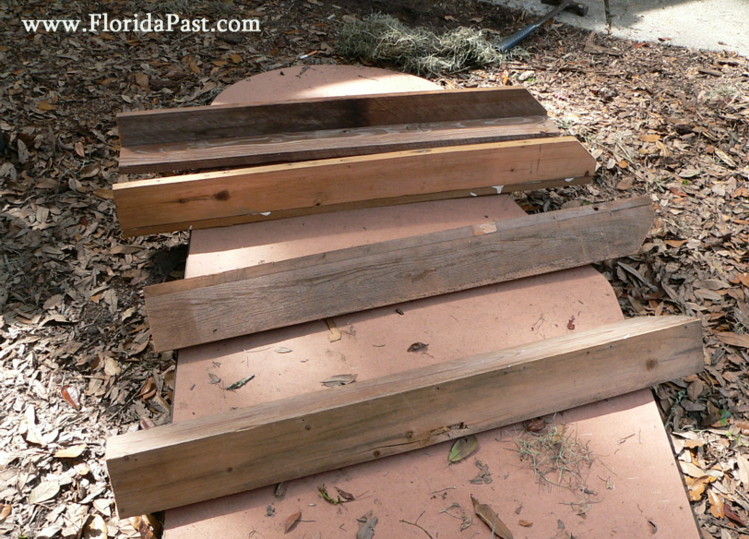
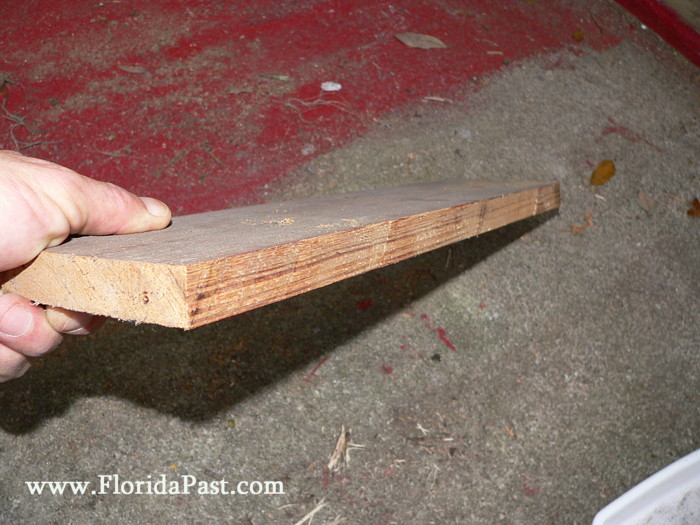
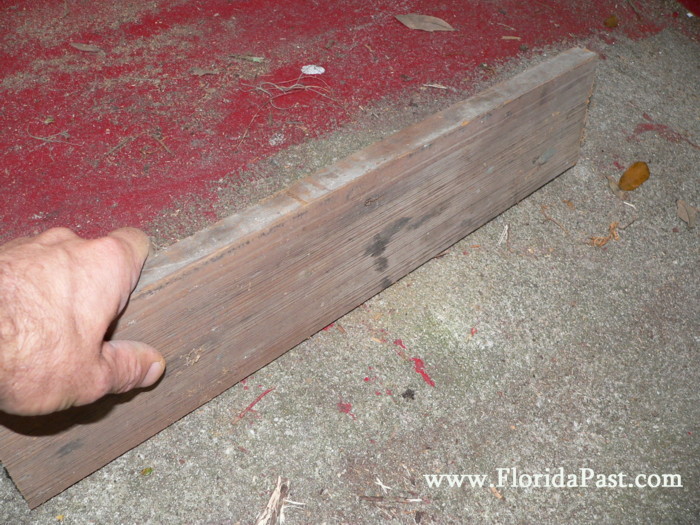
from various old wood that dates from 75-100 years and older

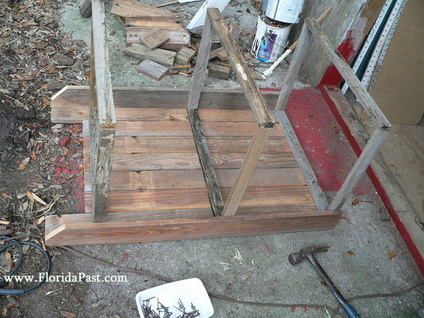
This was the first cabinet created

Click for a Larger View

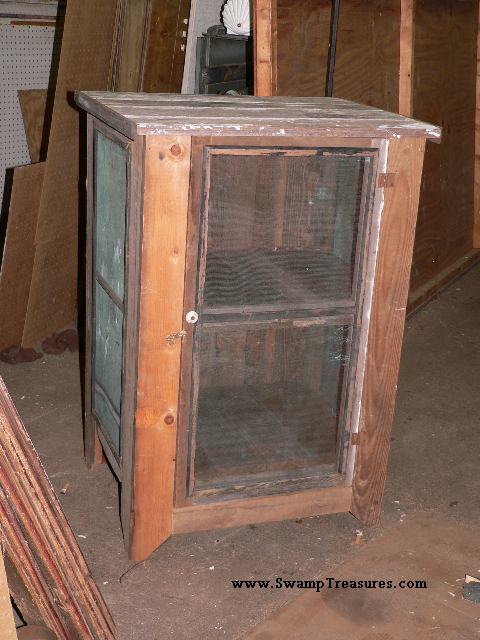
The first day pie cupboard
Finished and Ready to Go

Click for a Larger View
I show the completed cupboards first.


​First Day and Second Day Projects.

The images below, and along the right side, show the steps taken to bring this first day cupboard, to life.
Using OLD WOOD, OLD RUSTY NAILS, OLD HARDWARE and OLD SCREEN

Because of the wood limitations, each are made of mixed wood. Some painted, some not, whilst some are peely paints.

I'm going to show you all the steps it took, from start to finish. Duplicate these same steps for the second day pie-safe.

You can see how neat and tidy I keep my work area.....
THE WORK AREA - TOOLS AND AWAY WE GO

The basic tools and work bench we use

No need to be concerned about cleaning the floors when I'm finished
My Work Space


Just a few tools are needed. The chop saw makes it easier and faster
​than the conventional hand saw cutting. Which, believe it or not, YES, if need be, I still use the old trusted hand saw. I have about 6 different cuts.
These projects, the tools I used; Chop and Circular Saw, trim hammer and peen hammer, wall board knife, (for cutting the old brass screen), screw gun/drill, (don't want to pound nails into old hard wood, or CRACK, and it's now no good), hand held screw driver, a couple paint cans, (shown below for their use), and of course, a tape measure, pencil, (2 I use. cause we always mis place one along the way)  It's also a Good Thing to use a two foot square. Though, if your working with common sense, you may not need the square. Just as long as ALL your MEASUREMENTS are RIGHT ON, it has no choice, but to come out Square in the end.

Now if I were Only Organized!
This shows more wood, wood and more wood. Other things like paints, which most dried up by now, pluming, hardware, electrical and who knows what else lurks in and around.

HEY, I DID FIND, Buried Under a Pile of Wood,
A Old Hand Painted KEROSENE Sign ,
from a Local Sumter County, FloridaPast, Service Station. Long since defunct.

VIEW IMAGES OF THE EXTERIORS OF MY OLD TOWN BUILDINGS on my profile page. I'll show some of these buildings below.
ANOTHER SUPPLY OF OLD WOOD - STORED IN ANOTHER BARN BUILDING - Which I also Built some Many Years ago.

the "careful" hunt for old brass screen
----------------------
"careful" because it's Rare Stuff these days, and I must choose and use wisely. Not leaving much waste.
Even though, I SAVE ALL WASTE.
Cause it may not be waste someday.....

If your curious, just click the image for a larger view.
I didn't use any of this screen supply here or below. Pieces are a Nice Size for another project
Picture
ANOTHER PILE OF OLD BRASS SCREEN

Here I show the back of the cupboard. Just laying out. Nothing affixed yet. This is my first step in designing.
ALL Measurements
are derived from the backside measurements.

Laying out the back first, gives me the measurements for the cupboard
THIS WAS MY 'FIRST' STEP - LAYING OUT THE BACK. WHICH IS MADE OF TONGUE & GROOVE BEAD-BOARD
Since I've made quite a few of these cupboards in the past, I found that building the cupboard "around" the measurements of the back, makes it easier in the end. The pieces your looking at, didn't need to be cut. They were already cut apx. 100 yrs. ago. Still has the original varnish.
-----------------
This image right below, show the legs and part of the frame, "layed out" to give me all the rest of the measurements I need.
Nothing is attached as of yet.
I find it Best to Start from the Backside.
The Setting Up of Measurements
These are the frame or skeleton for the cabinet.
Made of 1" x 2" stock. Old Grayed Wood.
Be smart, and Remember to keep the COLOR HUES of the WOOD showing to the eye, in the end result, As Close As Possible. One MUST BE AWARE of this fact through the Entire Project. All facing woods, no matter, you Want to Look as Close as the Same Hue/Character/Color as possible.
If your measurements are Correct with your Frame, your doing Good! (this is one place I used a drill for pilot holes, then nailed together)
THE ENTIRE CABINET FRAME - BUILT FROM 1' x 2' - Apx. 20' x 25'

THIS IMAGE SHOWS THE FOUR LEGS

Notice the ANGLE CUTS at the bottoms - Giving your finished cupboard extra Character
FOUR LEGS - MADE OF 1' x 4' Southern Pine, apx. 100 yrs. old. -

This next image, I show one leg.
Notice they are constructed at a 45 degree. I used about five nails, each leg

Showing the construction of a leg - Pretty Easy to do this!
The entire leg is apx. 34' in height
If all your measurements are correct, this will fall into place smoothly
getting ready to secure frame to legs and back to frame
It didn't take that long... now did it?
ALL NAILED TOGETHER, READY FOR SHELVES
Gotta Really Love when things just Happen into Place!
Once again, found a Pile of PRE-CUT Boards, for the shelves
NO NEED FOR SAND PAPER - READ ON
I had to rip a couple of boards, like this one here
NO NEED FOR SANDPAPER
WHEN YOU HAVE A CONCRETE PAD OR BLOCK
this image shows me sanding any roughness from the edge
It's Perfect, Fast and Easy Solution!
And depending on where you use this practice,
it Can and Will Add Character to your Creation!
Make Sure you Always sand with the Direction of the wood's grain, or in other words, GO WITH THE FLOW!
Full Motion, Sanding/Grinding the Rough Edges

BIG OLD PAINT CHIPPY PEELY BOARD
USED FOR THE TOP BOARDS

This board was out in direct weather for over 7 years that I've owned it. And before that, it WAS an Exterior used board. So probably Well Over 75 Years Old! Now she'll survive hundreds of years
BIG Peely Chippy Painty BOARD - USED FOR TOP BOARDS
so VERY THANKFUL for the Cordless Drill....
some of the tools of the trade
JUST ADD THE DOOR, AND BING BANG, DONE
another view with top edge trim

THE FRAME FOR THE DOOR

The first step to creating the door
THE 1' x 2' FRAME FOR THE DOOR
The door frame, I also added a center stretcher for more support, both for the door and the mounting of screen and trim

ALL READY FOR YOUR HOME NOW

All ready for your home!
Again, in it's COMPLETED STATE - Note the little porcelain knob I used
Currently being Enjoyed someplace in North Carolina. As soon as I sold them, the Dealer Sold. Something to think about the next time a Historical Structure get's Demolished.

We will continue as time allows........

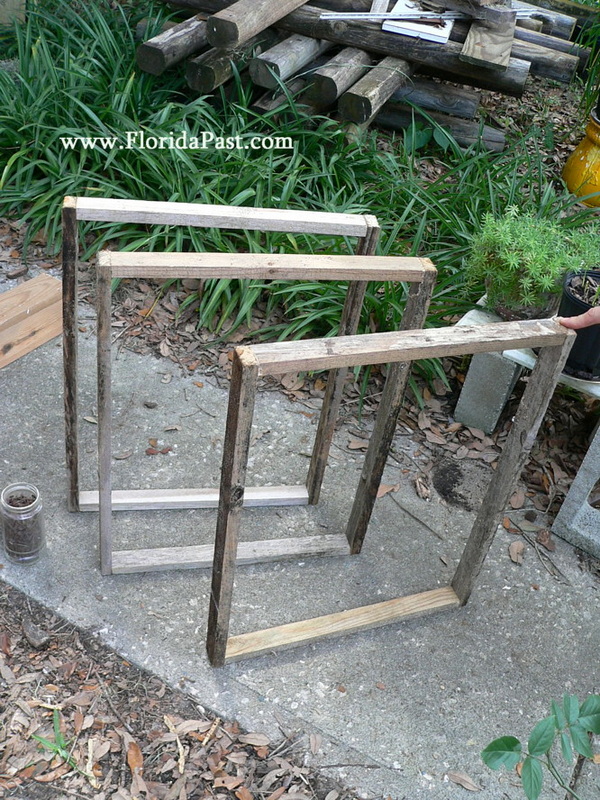
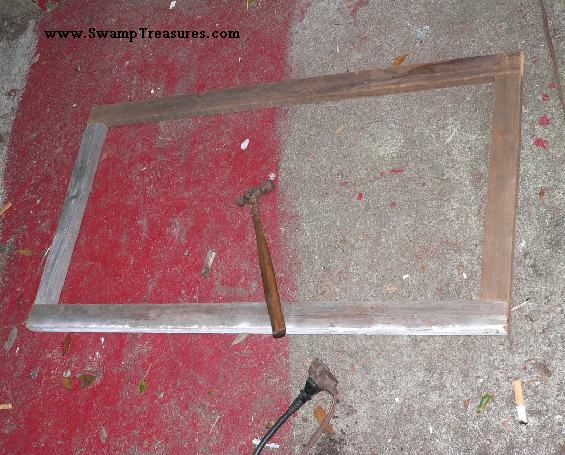
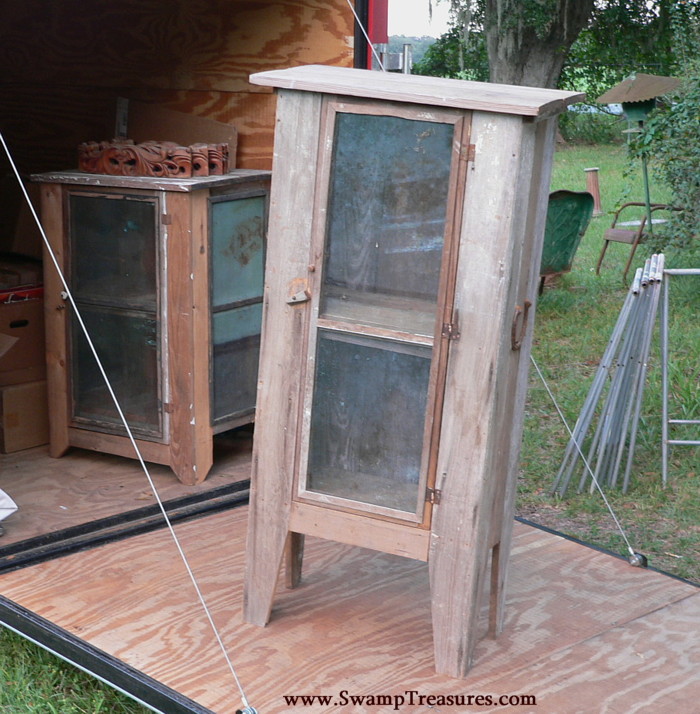
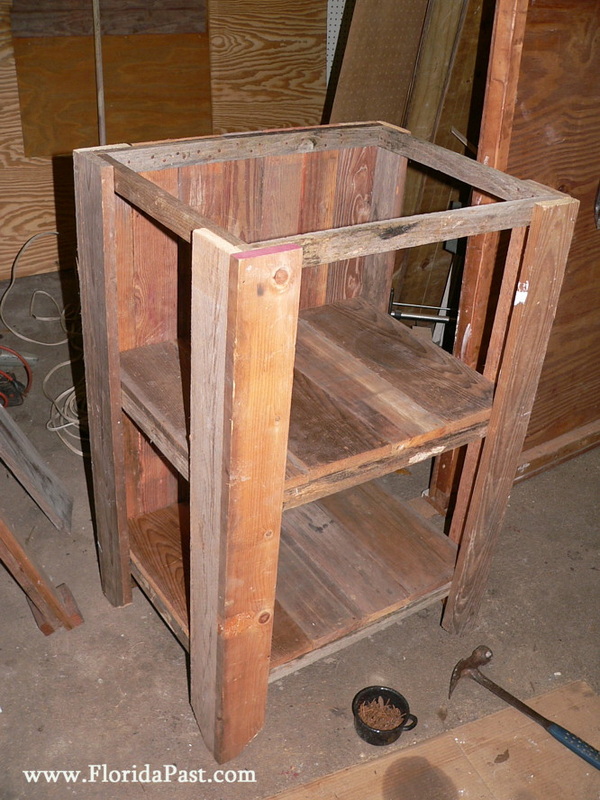
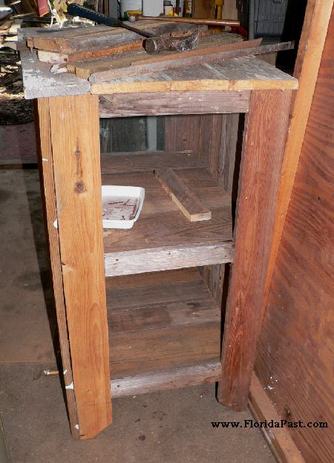
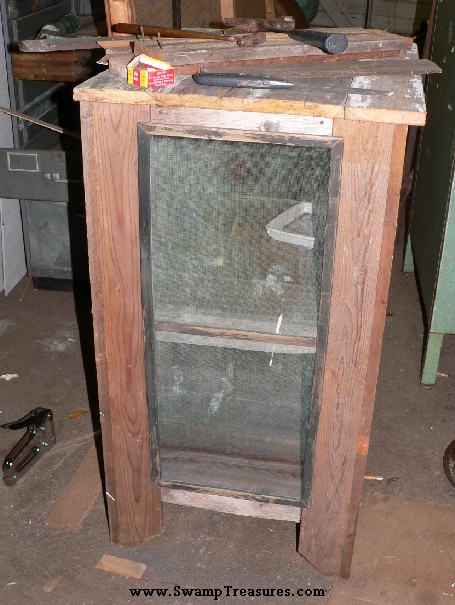
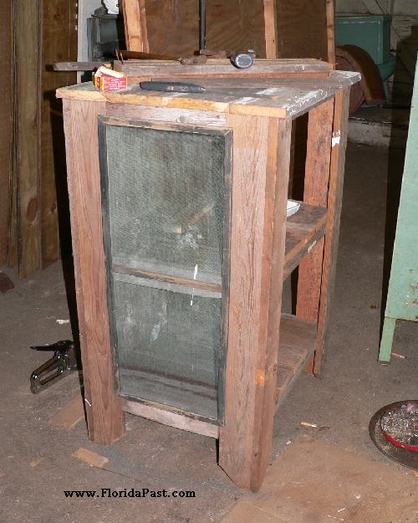
Our second day project Pie-Safe
ready to go

Click for a Larger View

And when we say go, we mean it.
The third day, both SOLD!

Click for a Larger View


This one took a little less time than the first.
Mostly because while hunting our two acres, buildings and piles of materials, the brain was already scoping out materials for this second cupboard.
More than Half my Time, is SPENT HUNTING AROUND, for that RIGHT PIECE.
But, it's also great therapy. And when the day is nice, the soul works better.

The Wood Shed, as it's written on the wood key fob, which I built some years ago, is where we begin our hunt for materials that would work.
Though I must be selective in doing so. In the mind, there are another hundred projects built, using materials currently stored away.

In here, LOTS of DOORS, WINDOWS, WOOD, Driftwood, roots, cypress and cypress knees, oh yah, some old skeleton remains of various wild animals. YES, I SAVE THAT STUFF TOO!
One of my Favorite Buildings. My Most Recent Build. Apx. 5 years ago.


Actually, this wood shed, isn't quite finished. There will be a porch on either side, and it still needs trimmings, and interior. This may be the future space for the "brick & morter" or in this case, wood & wood SwampTreasures place of business. To be announced.

This is some of what is in the wood shed

I Really NEED TO CLEAN this building, so I can use it to SELL SwampTreasures out of on Mondays with the Big Flea Markets in Town!
OLD ORIGINAL SCREEN & OTHER DOORS, WINDOWS from FloridaPast Cracker Houses, Barns, Buildings. With a Mix of Mother Nature's Givings!
I didn't use any of what your looking at here
I studied this pile, and most all these pieces are for future creations

This is another area of stored materials.
I did pick from this pile for these cabinets.

Another Favorite of Mine, and ANYONE who seen it. At one time, it wasn't used for storage. I guess I NEED TO BUILD MORE BUILDINGS.....
Notice the signages, this is a FloridaPast Country Store Porch

This wood shanty has been here over 15 years
The roof leaks in spots,
and Mother Nature continues to contribute Her Rath.
But, still, I do, and did, pick from this pile.
Actually found some Good Stuff!
​I was very pleased and surprised, to find that a good portion of this wood, was still in Excellent Shape!

WANNA SEE THIS BIGGER - CLICK IT - WILL OPEN IN A NEW WINDOW FOR YOU
Good Ole Green'd Brass Screen, the Best, if you know what I Mean!
Left Over Screen, from a project done years ago. IT WORKED OUT GREAT for these cupboards. And I still have smaller pieces left. Which Inspires me to Create Miniature Cupboards. Hey, my Next Project....

Must to Have Old Nails, Rusty Nails

Garage sales, flea markets and anywhere I can, I buy Rusty Nails, Old Screws and Hardware. It's PRICELESS STUFF!
Whenever I'm garage saling or flea marketing, I BUY OLD CANS, JARS and Containers of Nails, Screws and other Hardwares
My Priceless RUSTY NAIL SUPPLY USED FOR THESE PROJECTS! Can't get this at Home Depot!

MY HANDY HELPERS & PARTNERS

These paint cans, along with a piece of wood, made for the Perfect Helper, holding up the other side of the inner frame. This kept it all straight, tight, and very easy to work with.
The PERFECT HELPER! Quiet, No Questions Asked.
This is my HELPER. Why I said in tools needed, a couple of paint cans
The BEST HELP ONE CAN HAVE - SILENT and DOES WHAT YOU WANT IT TO DO!
another view of my helpers

Here I show 2 of the legs side by side
Notice the simple construction

Very Easy Style of Leg to Create
Joined together with 5 finishing nails at a 45 degree
If all your legs match when stood on their ends, Your In! All will Go Smooth!
A CLOSER VIEW OF ONE LEG
When securing the frames, legs and back, I nail All pieces from the inside.
This way there are no nails at these points to reveal.
Making for a better construction too.
We nail the back-boards from the soon to be 'inside'
THE BACKSIDE, LEGS AND FRAMES - NOW READY TO ATTACH

As you can see, the frame is built, and we are now ready to add the shelves

Now we are ready for the shelves
The FINISHED FRAME

Note the shelves, running back to front
Normally we run left to right to avoid open ends.
but while hunting for shelf wood, I came across a small pile of Already Cut to Size, for a back to front.
I figure, why Waste!

We are almost home now
ANOTHER VIEW OF THE FINISHED FRAME WITH SHELVES

This stage, we are ready to cut and secure our "cross trims", 3/4" thick, so we can attach the screen and screen trimmings

We are now ready for the 'center' caps to attach the screen and screen trim too
Another view shown here

That BIG Peely Painted Board, image on left, became the PERFECT TOP.

inbetween the legs, over the shelf board edges
Showing where the 'cross trim' goes
A few more details, and we are ready for screen and door
Just about Finished!

ANOTHER VIEW OF TOP & BACK

We are Now Ready for the 'Cross Trims'
Notice the back edge of the top board. I left some rusty things that were affixed to it from the begining of time - adding more Character

Here she is with screen
All trimmed out

I am now ready to construct a door
At this point, I already did the 'cross trims' secured and trimmed the screen on both sides
We are ready to create and install the door
All we need to do now, is trip the tops open ends, and make the front door

I Sincerely Hope you Enjoyed our little project building

Take our TOURS, and check out our offerings.
Meander around FloriaPast, there just may be something you want to buy


THANK YOU ALL FOR THE VISIT
and Please Come'on back again!

___________________________________________________________

Powered by Create your own unique website with customizable templates.